Creating a Bootable Ubuntu USB Drive From an ISO File Using dd
If you’ve followed my previous tutorials on Creating a Ubuntu UEFI boot USB and Creating a Bootable Windows 10 UEFI USB Drive Using Linux, you’ll understand how easy it is to create UEFI USB boot drives for modern UEFI based systems. But what if we have an older system that isn’t UEFI based? It’s still pretty easy to create a bootable USB drive, the process is just a little different.
For this tutorial I’m going to use Ubuntu 18.04 as my host OS, as that’s what I primarily use full time.
Table of Contents
Before you begin there are a few things you’re going to need:
- USB drive you don’t mind erasing (8GB in size or greater)
- Ubuntu ISO file from Ubuntu.com
The dd Command
We’re going to use the dd command to copy the ISO image onto our USB device. The dd utility is used to copy and convert files, and since everything in Linux is treated as a file, including hard drives, we can use this utility to make an exact copy of an ISO file onto a USB device.
I should note that this won’t work for any old ISO file. The ISO file has to be an image created from a bootable device already.
WARNING
The dd command is a very powerful command, such that if you are not careful you can wipe out all data on your computer or other devices very easily. Please read and follow all commands in this tutorial carefully.
Basics of the dd Command
Quite simply, the dd command takes an “input file” and copies it exactly to an “output file”. This allows us to use the dd command to not only copy files, but we can also use it to make an exact clone of one drive to another.
There are obviously more flags and things that dd can do, however the concept of the input file and output file are the most important to understand in order to prevent data loss.
The structure of the dd command is as follows:
$ dd if=/path/to/source_file of=/path/to/destination_fileWhere “if=” corresponds to the input file that you want to copy from and “of=” corresponds to the output file that you want to copy to.
Formatting the USB Drive
Technically it’s not necessary to format the USB drive before we write the image to it using dd, as dd will replace the entire contents of the drive with the contents of the ISO file. The reason I like formatting the drive first is because it reinforces for me which drive (/dev/sdX) I’ll be working with.
-
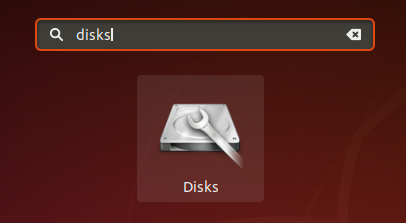
Insert your USB drive, then open the “Disks” utility
-
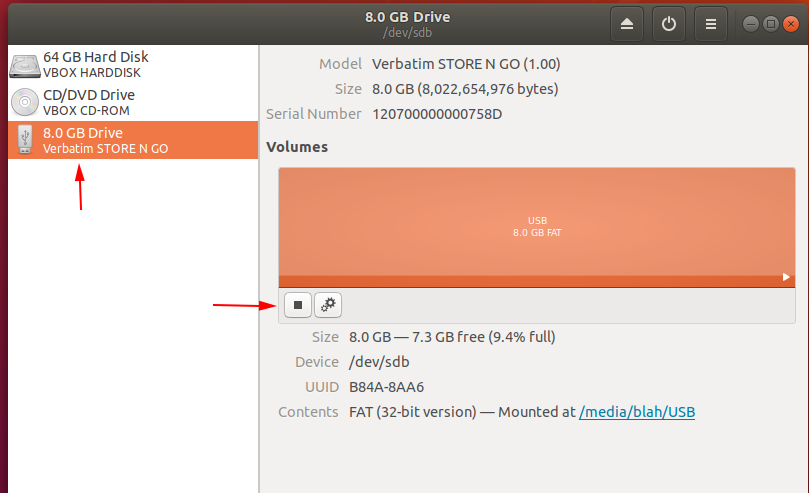
Choose your USB drive from the available drives on the left then click the stop button to unmount the drive
-
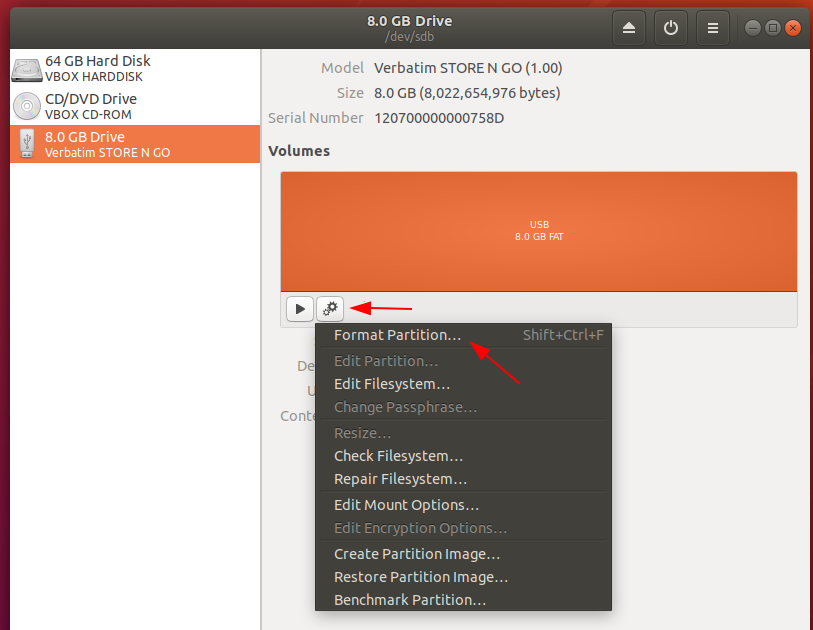
Click the “gear” icon and then click Format Partition
-
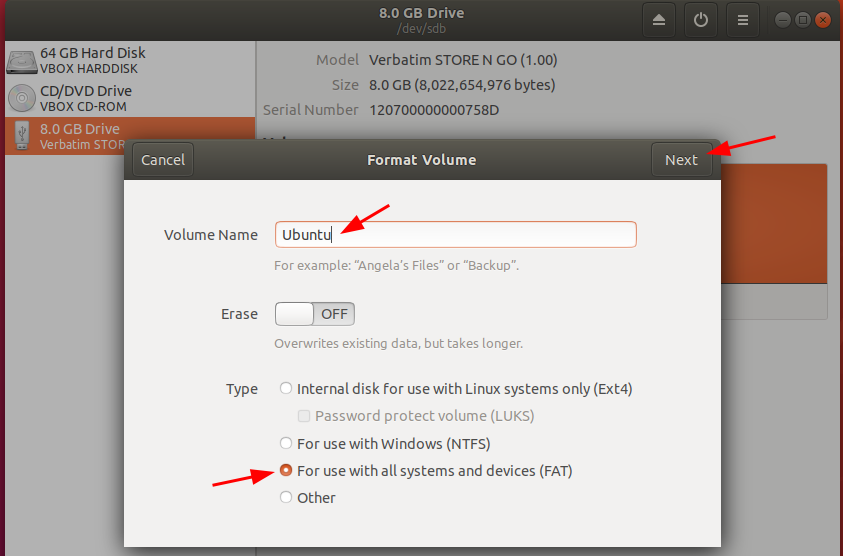
Give the volume a name. Spaces are allowed but sticking with underscores (_) and hyphens (-) will make things easier to reference from the command line. Let’s give it the name of “Ubuntu”. Make sure the “FAT” option is chosen, then click Next
WARNING
Clicking “Apply” on the following screen WILL delete ALL data on the selected partition. Ensure the correct drive/partition is chosen as choosing the wrong drive WILL DELETE ALL DATA on that drive. You have been warned.
-
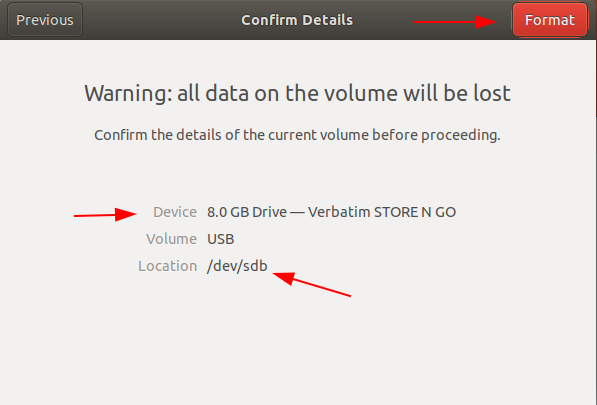
A summary warning screen will appear asking you to confirm the details. When you are ready click “Format”
-
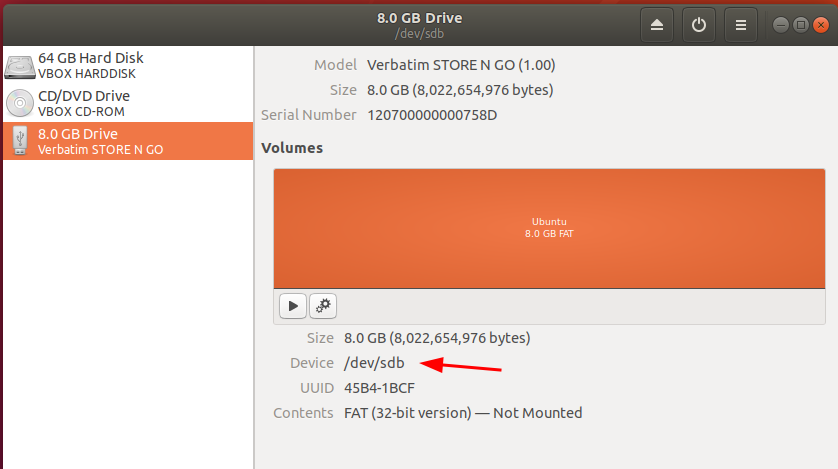
When the format is complete leave the drive unmounted (i.e. Don’t press the “Play” button to mount the drive). We can see that our device is /dev/sdb
Creating the Bootable USB
Now we can use the dd command to write our ISO image file to our formatted USB
-
Open a terminal window
-
I have my ISO file in my Downloads folder, so I’m going to change my directory to there and then perform a directory listing
$ cd ~/Downloads
$ ls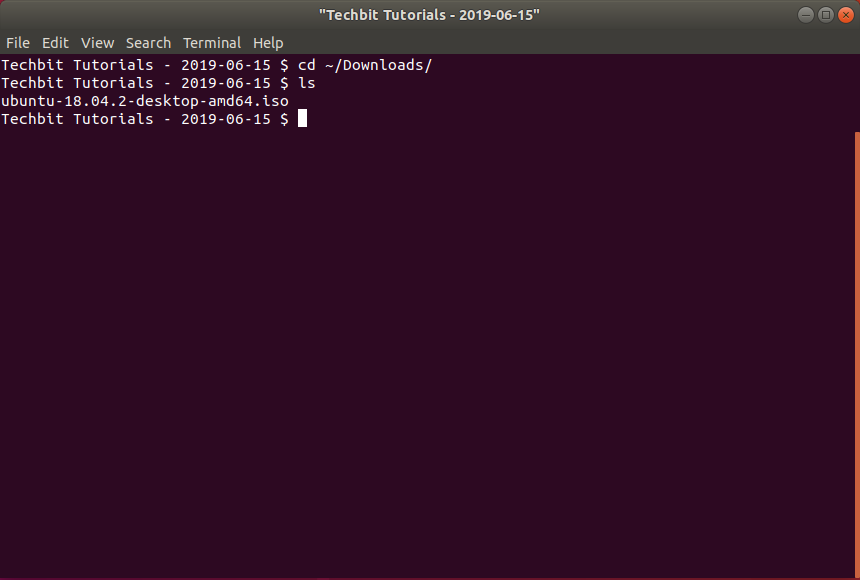
-
Before I use dd I’m just going to make sure that I know which device corresponds to my USB drive using the lsblk command.
Even though we didn’t mount the USB device after we formatted it the lsblk command will still list all block devices on the system, including our USB device. I’m going to pipe the output to grep so I can cut out the noise of the “loop” devices and just see anything that matches a /dev/sdX device.
Remember the warning I gave at the beginning of this tutorial about how dangerous dd is? Yeah that. Check three, four, five, as many times as you need to feel comfortable that you have the correct device before you issue the dd command. You can thank me later.
$ lsblk | grep -i sd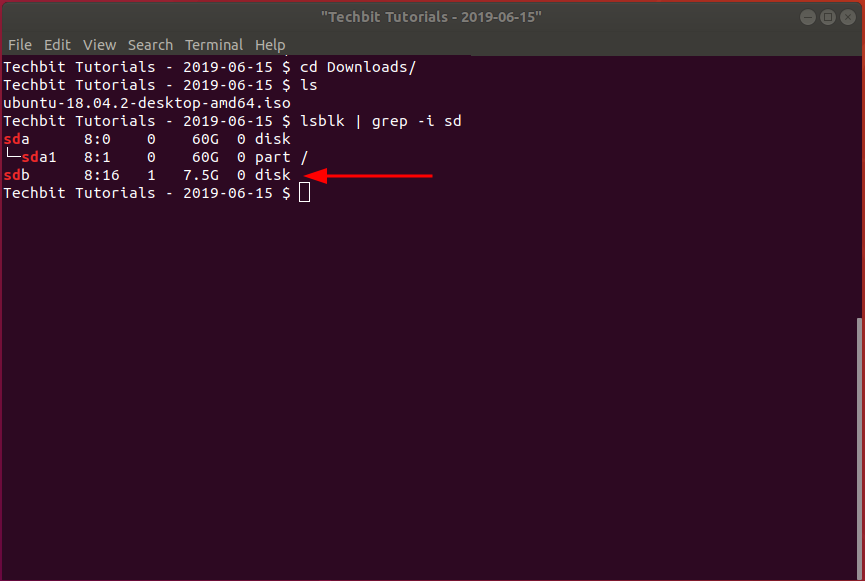
-
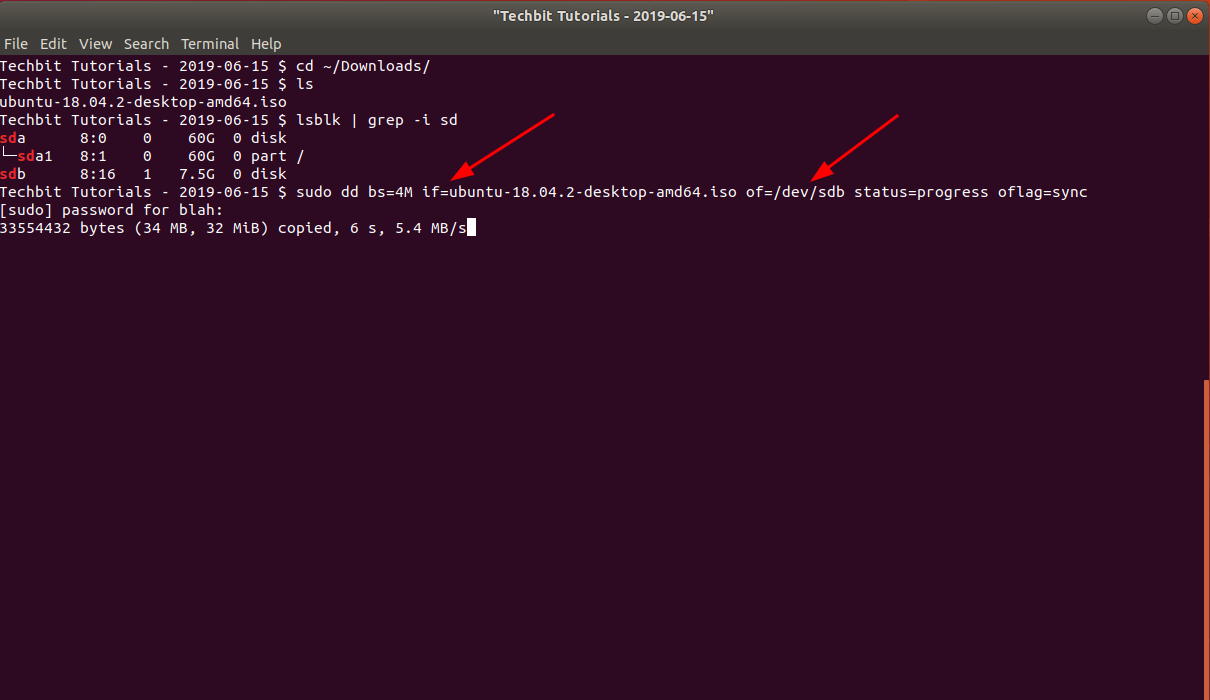
Now let’s use dd to write the ISO file to our USB
WARNING
This is your FINAL warning to ensure you have the correct device and dd command before proceeding. If you have this command incorrect, such as having the wrong device in the of= flag, you will have a very bad day.
$ sudo dd bs=4M if=ubuntu-18.04.2-desktop-amd64.iso of=/dev/sdb status=progress oflag=syncBreakdown of the above dd command:
- bs=4M: Specify that a 4 MB block size should be used
- if=ubuntu-18.04.2-desktop-amd64.iso: Input file we want to copy
- of=/dev/sdb: Output file (device) that we want to write to
- status=progress: Show the progress of the dd command
- oflag=sync: Sync after each output block. This can slow down our write time to our device, but it ensures that all data gets effectively “synced” to our USB device as it’s being written.
-
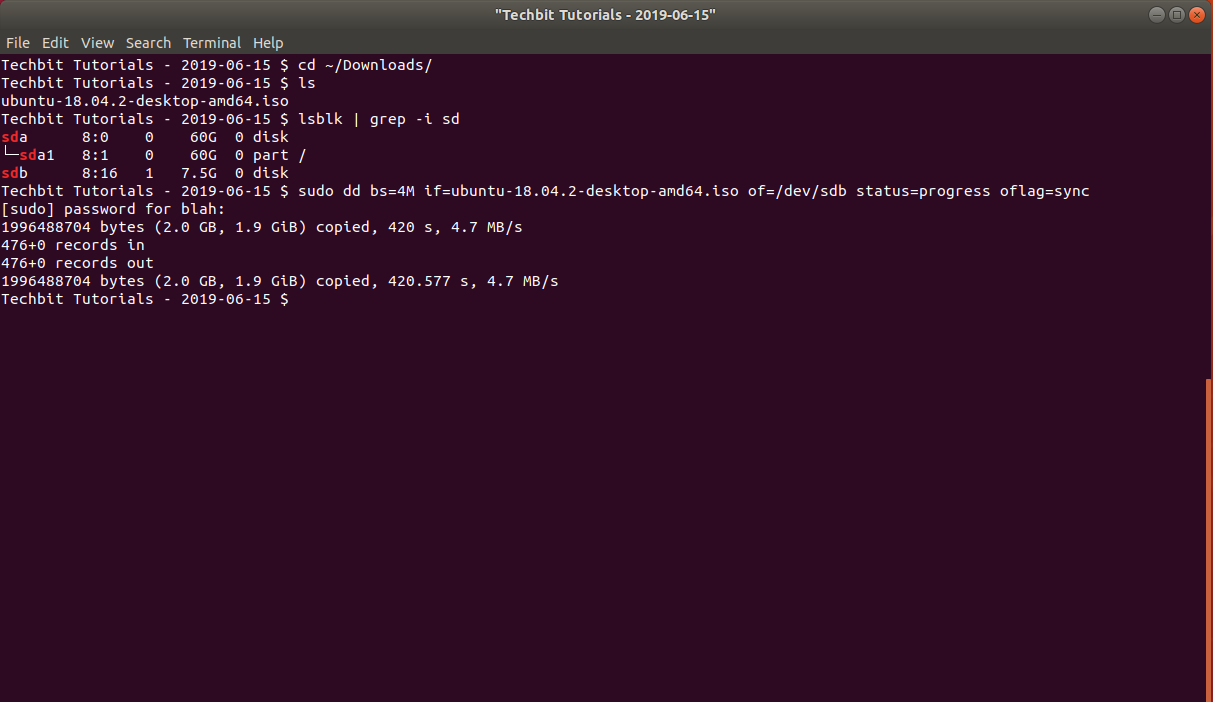
After the dd command is finished you should see something similar to the following:
-
Ubuntu should have automatically mounted the USB device after dd was finished. You can check to see if it’s mounted with the df command.
Since Ubuntu creates a “snap partition” for every Snap application installed, I’m going to filter out that noise by piping to grep with a negative (-v) case insensitive (-i) search for snap
$ df -h | grep -i -v snap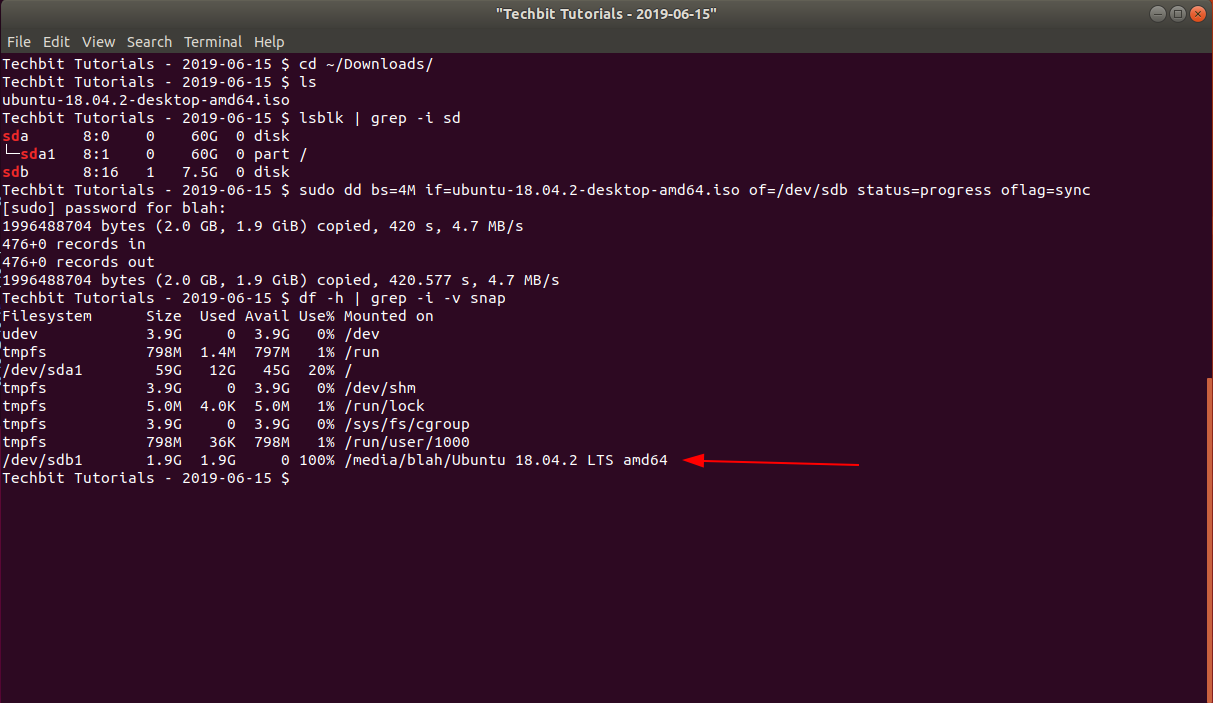
-
Since I can see that it’s mounted, I can issue a ls command to see if there are any files on the drive
$ ls /media/blah/Ubuntu\ 18.04.2\ LTS\ amd64/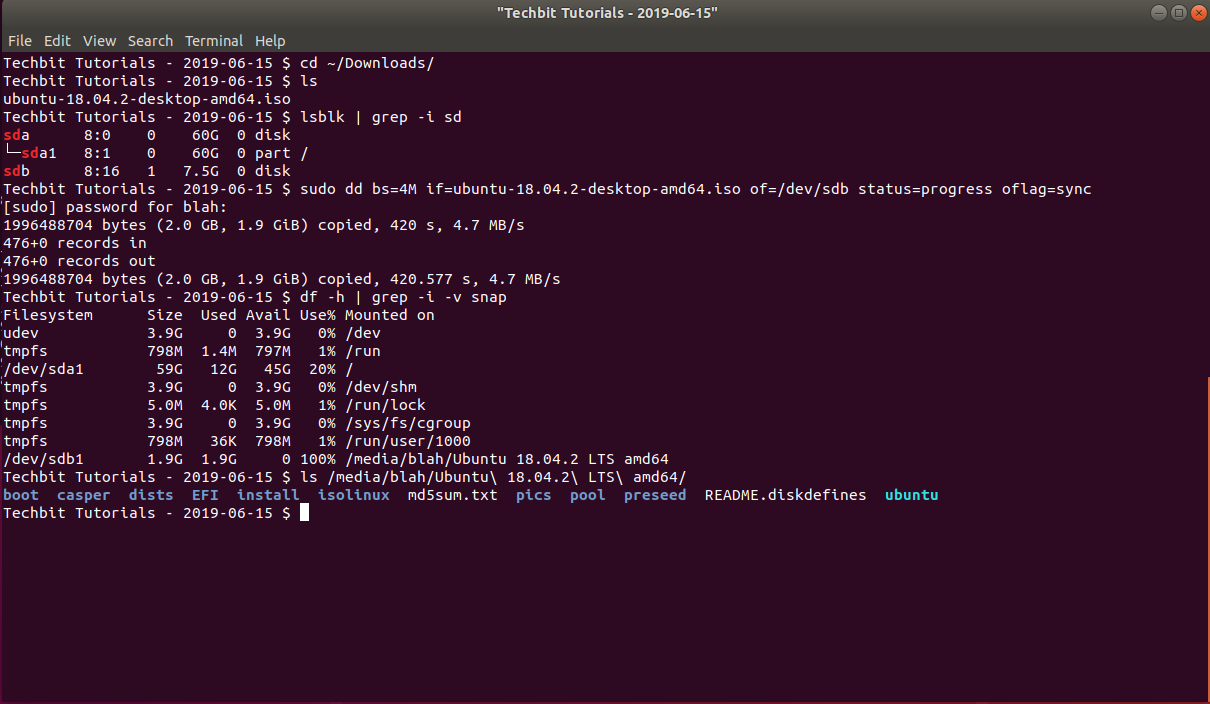
Congratulations, you should now have a bootable USB Drive built of a Ubuntu 18.04.2 OS : )
If you have any questions/comments please leave them below.
Thanks so much for reading ^‿^
Claire
If this tutorial helped you out please consider buying me a pizza slice!