Logging Into Zoneminder Using an Authentication Hash
Table of Contents
Introduction
In a previous post on Using a Raspberry Pi For Digital Signage, I mentioned that I was using my Raspberry Pi as a display for viewing the cameras for my Zoneminder system. Since I didn’t want to put a plaintext password into a script, I was wondering if there was some other solution I could use to have the script pass the login information to the Zoneminder server. As it turns out, Zoneminder has this feature built-in!
Things you will need
- Zoneminder authentication options configured
- The secret hash set in the authentication options
- A dedicated user account in Zoneminder to use for the viewer
- The password hash of the dedicated user account
The problem with plaintext passwords
If you store plaintext passwords in a script file, you greatly increase the chances of that account being compromised. This can happen in a number of ways, including shoulder surfing, access by other users on the same system, file access through vulnerabilities in the web application (i.e. misconfiguration, directory traversal), etc.
The point is, as long as someone can “see” the file containing the password, that password is immediately compromised.
The Auth Key
The feature we’re looking for is called “AUTH_HASH_LOGINS”. This is a rather poorly documented feature in the Zoneminder documentation that essentially boils down to:
If this option is enabled then adding an ‘auth’ parameter to any request will include a shortcut login bypassing the login screen, if not already logged in. As authentication hashes are time and, optionally, IP limited, this can allow short-term access to ZoneMinder screens from other web pages etc.
I say “poorly documented” because while the option itself is described pretty decently in terms of what it’s used for, there is no documentation that I could find detailing how to actually generate and use the authentication key.
I was skeptical on how secure this would be, but once I started looking into it I found that it’s actually pretty solid… provided that you take certain precautions of course and randomly generate both the secret key and the user’s password as long (40+ character) strings.
The auth key is generated by this section of code in includes/functions.php:
- php
1 |
|
Author’s note: The above function generateAuthHash() and the getAuthUser() function that we’ll see a little later on is contained inside the includes/functions.php file up to Zoneminder version 1.30.4. In version 1.32.0, these functiions have been moved to the file includes/auth.php.
We’ll revisit this code in more detail later on.
Configuring Zoneminder to allow logins via authentication hash
Before we get to breaking down how to generate this mystical authentication hash, we first have to configure Zoneminder to allow authentication via the hash.
- Login to Zoneminder as an administrative user
- Click the “Options” link in the upper right-hand corner
- Click the “System” Tab if it isn’t already selected
- The following authentication options will need to be configured:
- OPT_USE_AUTH: Checked
- AUTH_TYPE: builtin
- AUTH_RELAY: hashed
- AUTH_HASH_SECRET: Randomly generated, long (40+ character) string
- AUTH_HASH_IPS: Unchecked
- AUTH_HASH_LOGINS: Checked
- Save when finished
Below is a screenshot from my Zoneminder instance.

Before anyone asks or complains or trys to call me out on this, no the above screenshot does not show part of the AUTH_HASH_SECRET I’m using. This is a temporary Zoneminder instance in a VM that I set up specifically for this post.
I’m not going to describe what each option does, for that please refer to the Zoneminder documentation. The only option I will comment on is the “AUTH_HASH_SECRET”.
Change this from the default; preferably to something long (40+ characters) and randomly generated from a password manager. This isn’t something you need to remember or type out, so generate a long character string using a password manager, then copy/paste it in and be done with it. Doing this will greatly increase the strength of the auth hash when it’s generated.
Create a dedicated user account for the viewer
- Open up the Zoneminder Options again
- Click on the “Users” tab
- Click on the “ADD NEW USER” button
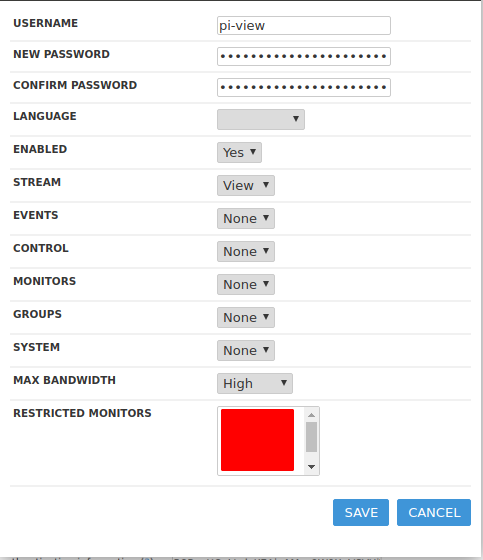
- Fill out the desired information to add a new user
- If this account is only going to need to see the live stream, the “View” option next to Stream is sufficient
- Make sure you set a strong password that’s randomly generated from a password manager, long (40+ characters), and also different than the one you used for the AUTH_HASH_SECRET!!
- Save when done
Finding the password hash
We’re going to need to get the password hash from our “pi-view” user account as this will be used as part of the criteria when generating the password hash.
Putting a password hash in a script is only one step removed from having the plain text password in the script. It’s very important that your password be randomly generated and long (40+ characters) to prevent easy cracking of the password if someone were to get the hash.
-
Login to MySQL on the Zoneminder server. Preferably you would have an administrative account in MySQL that isn’t “root”, but again this is a temporary setup for the purposes of this post.
Note that MySQL is case-sensitive, so “Users” is different than “users”.
$ mysql -u root -p Enter password: -
Show the existing databases
mysql> show databases; +--------------------+ | Database | +--------------------+ | information_schema | | mysql | | performance_schema | | sys | | zm | +--------------------+ 5 rows in set (0.04 sec) -
Change to the Zoneminder database
mysql> use zm; Reading table information for completion of table and column names You can turn off this feature to get a quicker startup with -A Database changed -
Show the existing tables (output truncated)
mysql> show tables; +----------------+ | Tables_in_zm | +----------------+ | Config | | ControlPresets | | Controls | .... | Users | | ZonePresets | | Zones | +----------------+ 18 rows in set (0.00 sec) -
Identify the columns that exist in the “Users” table (output truncated)
mysql> show columns from Users; +--------------+----------------------------+------+-----+---------+----------------+ | Field | Type | Null | Key | Default | Extra | +--------------+----------------------------+------+-----+---------+----------------+ | Id | int(10) unsigned | NO | PRI | NULL | auto_increment | | Username | varchar(32) | NO | UNI | | | | Password | varchar(64) | NO | | | | ... | MaxBandwidth | varchar(16) | NO | | | | | MonitorIds | text | NO | | NULL | | +--------------+----------------------------+------+-----+---------+----------------+ 14 rows in set (0.02 sec)Now that we know what columns are available in the table, we can build a query to show us exactly what we want, which is the username and password hash.
-
Show the properties of the “pi-view” user account
mysql> select Username,Password from Users where Username = 'pi-view'; +----------+-------------------------------------------+ | Username | Password | +----------+-------------------------------------------+ | pi-view | *63DC766F4E4C533B56059033000778787BA1A8CE | +----------+-------------------------------------------+ 1 row in set (0.00 sec)As before, the password hash above is not a hash of my real password. This is a dummy account created on a temporary VM for the purposes of this post.
And there we have it, the hash of our "pi-view" user that we can copy/paste into our script that we're going to write next. Be sure to copy the entire line of the hash, beginning at the \* (in this case we would copy *63DC766F4E4C533B56059033000778787BA1A8CE)
How Zoneminder generates the auth hash
As mentioned earlier, the auth key is generated by this section of code in includes/functions.php:
- php
1 |
|
I’m not going to go into too much detail about the code above, but I will point out a few things of importance:
-
In line 3, localtime() returns an array of values to describe the time. From the PHP documentation on the localtime function, we can see that the array consists of the following:
- “tm_sec” - seconds, 0 to 59
- “tm_min” - minutes, 0 to 59
- “tm_hour” - hours, 0 to 23
- “tm_mday” - day of the month, 1 to 31
- “tm_mon” - month of the year, 0 (Jan) to 11 (Dec)
- “tm_year” - years since 1900
- “tm_wday” - day of the week, 0 (Sun) to 6 (Sat)
- “tm_yday” - day of the year, 0 to 365
- “tm_isdst” - is daylight savings time in effect? Positive if yes, 0 if not, negative if unknown.
- For example 2:46:32 PM on November 8, 2018 would be represented in the array like this
(arrays start counting at position 0):
- Array ( [0] => 32 [1] => 46 [2] => 14 [3] => 8 [4] => 10 [5] => 118 [6] => 4 [7] => 311 [8] => 0 )
We’re also not going to incorporate the Remote IP Address into the authentication hash because that doesn’t work very well behind NAT, so we’re not interested in lines 4-5. The part of the code that we care about is lines 6-9 above.
- php
1 |
|
This tells us that the authKey is going to be generated by combining the following items together:
- AUTH_HASH_SECRET: ZM_AUTH_HASH_SECRET
- Username: $_SESSION[‘username’]
- Username’s password hash: $_SESSION[‘passwordHash’]
- Hour: $time[2]
- Day: $time[3]
- Month: $time[4]
- Year: $time[5]
Once all those things are joined together, the “auth” parameter is an md5 hash of that string.
The auth hash can only be used to perform a login within a two hour period as defined by this code (specifically lines 12-25):
- php
1 |
|
Even though the hash can only be used within two hours to perform a login, once logged in the session will remain active until the browser window is closed.
We now have all the information we need in order to write a script in bash that can generate the authentication hash for us to add to our URL.
Generating the hash using Bash
I decided to write this in bash so that I can use it in a startup script without having to install any additional components on my Raspberry Pi, but it really doesn’t matter. You could write this in Python, PHP, etc., whatever you’re comfortable using.
-
Create a new file on the Raspberry Pi called “genHash.sh”
$ nano genHash.sh -
Copy and paste (or type) the following code into the file and modify the “secretKey”, “userName”, “passwordHash”, and “domain” variables to suit your environment.
Note you can switch between the bash code and the original PHP code by clicking the “bash” or “php” tabs in the upper-right of the codeblock below.
genHash.sh - bash
- php
1
2
3
4
5
6
7
8
9
10
11
12
13
14
15
16
17
18
19
20
21
22
23
24
25
26
27
28
29
30
31
32
33
34
35
36
37
38
39
40
41
42
43
44
45
46
47
48
49
50
51
52
53
54
55
56
57### Define variables used for auth secretKey="MBeReDpw5wgnYP4EWbF9QV7YRNtVe4pU4wMpyKLtJ9kWVYmjME" userName="pi-view" passwordHash="*63DC766F4E4C533B56059033000778787BA1A8CE" domain="example.com" ### Define date variables # Get hour (24-hr) format, pad < 12 with a space instead of leading 0. Use "sed" command to remove space hour="$(date +%k | sed 's/^ //')" # Get day, pad < 10 with a space instead of leading 0. Use "sed" command to remove space day="$(date +%e | sed 's/^ //')" # Get the month (date command starts counting the month at "1") fullMonth="$(date +%m)" # PHP localtime starts counting the month at "0", so minus 1 from the month to match month="$((fullMonth-1))" # Get the full year (4 digits) fullYear="$(date +%Y)" # PHP localtime represents the year as the number of years since 1900. As such, we need to take # the current year and subtract 1900 from it year=$((fullYear-1900)) ### Build the auth URL # Concatenate all the above together in the correct order as defined by the generateAuthHash() # function in Zoneminder authKey="$secretKey$userName$passwordHash$hour$day$month$year" # Generate the md5 hash of the concatenated string authHash="$(echo -n $authKey | md5sum | cut -d ' ' -f 1)" # Create our base URL. base_url="https://$domain/index.php?view=montage&group=1&scale=0.75&auth=" # Create our "auth" URL by concatenating the authHash to our base URL string auth_url="$base_url$authHash" ### Print the output of all the variables to the screen so we can see what our commands ### are generating echo "SecretKey is: $secretKey" echo "userName is: $userName" echo "passwordHash is: $passwordHash" echo "domain is: $domain" echo "hour is: $hour" echo "day is: $day" echo "month is: $month" echo "Years since 1900 is: $year" echo " " echo "authKey is: $authKey" echo "authHash is: $authHash" echo "base_url is: $base_url" echo "auth_url is: $auth_url" - Save the file by holding the CTRL key and pressing “o”, then hit enter. Then exit Nano by holding the CTRL key and pressing “x”.
Running this script will then produce the following output:
$ bash genHash.sh
SecretKey is: MBeReDpw5wgnYP4EWbF9QV7YRNtVe4pU4wMpyKLtJ9kWVYmjME
userName is: pi-view
passwordHash is: *63DC766F4E4C533B56059033000778787BA1A8CE
domain is: example.com
hour is: 19
day is: 11
month is: 10
Years since 1900 is: 118
authKey is: MBeReDpw5wgnYP4EWbF9QV7YRNtVe4pU4wMpyKLtJ9kWVYmjMEpi-view*63DC766F4E4C533B56059033000778787BA1A8CE191110118
authHash is: aa8fecb85c61908788db3e4d25c09f3e
base_url is: https://example.com/index.php?view=montage&group=1&scale=0.75&auth=
auth_url is: https://example.com/index.php?view=montage&group=1&scale=0.75&auth=aa8fecb85c61908788db3e4d25c09f3eIf you copy the auth_url output and paste it in a browser, you should automatically log in to Zoneminder with the montage view selected.
Note: In the URL above, I’m using the “group” and “scale” parameters in order to view group 1 of my cameras and also scale the size to 3/4x original because I’m using a smaller monitor for the display. These parameters are only required if you are using groups (and want to select a specific one) or if you want to scale the view. https://example.com/index.php?view=montage&auth=aa8fecb85c61908788db3e4d25c09f3e will work without these parameters.
If the generated URL allowed you to log in, congratulations! You’re ready to move on to incorporating this generation script into your startup script for automatic display on boot.
If you did not get the URL to work, just relax and start stepping through the problem logically:
- Did your genHash script give an error?
- If so, there’s a problem with your script so check over your code carefully for any missing quotes, semi-colons, brackets, etc.
- Did your genHash script finish running and output a URL?
- If so, the script is functional so check to see if the output of the genHash script matches your expectations
- Do the variable values look right, does the authKey look like it’s being joined together correctly, etc.
Incorporating the hash generation into the startup script
Since this tutorial is an extension of the previous Using a Raspberry Pi For Digital Signage tutorial, we’re going to use the startup script we wrote for that. As such, please see that post if you have any questions about the script below.
-
Edit the existing startMidori.sh script
$ nano startMidori.sh -
Paste your genHash code into the existing script so that it looks like the below (but with your own modifications of course)
To make things easier to read, I’ve removed the comments and extra white space from the script below so that you can clearly see the code and where it’s placed compared to the original startup script.
1
2
3
4
5
6
7
8
9
10
11
12
13
14
15
16
17
18
19
20
21
22
23
24
25
#!/bin/bash

xset -dpms # disable DPMS (Energy Star) features.
xset s off # disable screen saver
xset s noblank # don't blank the video device

secretKey="MBeReDpw5wgnYP4EWbF9QV7YRNtVe4pU4wMpyKLtJ9kWVYmjME"
userName="pi-view"
passwordHash="*63DC766F4E4C533B56059033000778787BA1A8CE"
domain="example.com"

hour="$(date +%k | sed 's/^ //')"
day="$(date +%e | sed 's/^ //')"
fullMonth="$(date +%-m)"
month="$((fullMonth-1))"
fullYear="$(date +%Y)"
year=$((fullYear-1900))

authKey="$secretKey$userName$passwordHash$hour$day$month$year"
authHash="$(echo -n $authKey | md5sum | cut -d ' ' -f 1)"

base_url="https://$domain/index.php?view=montage&group=1&scale=0.75&auth="
auth_url="$base_url$authHash"

matchbox-window-manager -use_cursor no & midori -e Fullscreen -a "$auth_url" > /dev/null 2>&1
Testing the Script
Let’s test the script now to see if it will actually launch the web browser and login to our Zoneminder instance.
$ sudo xinit /home/pi/startMidori.shThis will run the script in your terminal. You will likely see a bunch of extra messages in the terminal, but the web browser should launch and login to Zoneminder. Since this is just a test, you’ll want to close the web browser in order to get back to the command line. You can do this by holding the CTRL key and pressing “c” at the same time.
Restart the Pi
$ sudo rebootOnce the Pi restarts, the Midori web browser should launch on startup and login automatically to Zoneminder.
Congratulations, you now have a fully automated (and secure) method of displaying your cameras from Zoneminder.
If you have any questions/comments please leave them below.
Thanks so much for reading ^‿^
Claire
If this tutorial helped you out please consider buying me a pizza slice!