Using a Raspberry Pi For Digital Signage
Table of Contents
Introduction
I have a surveillance camera system using four (cheaper) wireless cameras and Zoneminder to monitor and record events. I’ll discuss this setup in more detail in a future post.
For now though, I want to describe how I set up a spare Raspberry Pi as a viewer for the four cameras. This is just loading the URL for the “montage view” in Zoneminder, which let’s you see all your cameras arranged in a grid. Since it’s just a regular URL though, you can follow this tutorial and use any URL you want to display content from.
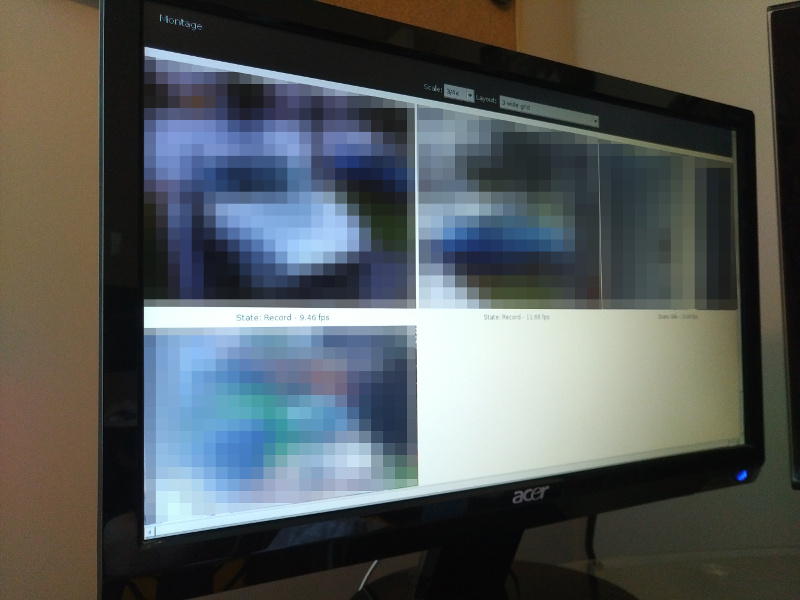
I had an old 14 inch LCD monitor that would be perfect as a dedicated display for this.
The Raspberry Pi I’m using to drive this display is a first generation B+. It’s not the fastest thing around, especially compared to the latest Raspberry Pi 3 B+, but it’s fast enough to do the job.
This setup will be a “headless” system, which means that it will run without a keyboard or mouse attached and will be administered remotely. Since I also prefer to automate all the things, the system will run with very little interaction required from me.
So, let’s get to it!
Things you will need
- Spare monitor that you can use as a dedicated display
- Raspberry Pi
- 8GB+ SD card installed with Raspbian Lite
- Video cable (HDMI, VGA, DVI, etc.)
- A website URL to display
Things you might need
- VESA mount
- HDMI to VGA adapter
- Velcro ties
- Magnets
- Gorilla Glue
This tutorial assumes that you already have Raspbian Lite installed to the SD card and have set up and configured SSH.
I chose Raspbian Lite because I wanted an OS that was as slimmed down as possible, and besides, working with the command line is more fun anyway : )
Everything we do assumes you are accessing Raspbian Lite through SSH. All the steps below can also be performed directly on the Pi itself with a keyboard plugged in. Using SSH provides a bit more freedom in that you can copy and paste the below commands into the terminal window.
Updating and Installing New Packages
Begin by running a system update to install the latest packages:
$ sudo apt update && sudo apt upgrade -yOnce the updates are finished, reboot the Pi to ensure all running programs have been properly updated:
$ sudo reboot Now we need to install a few packages to make a minimal graphical environment, namely an x server, window decorator and a web browser.
$ sudo apt install x11-server xorg midori matchboxWriting The Script
We’re going to need to write a script that will launch the web browser. The main reason for doing this is we can then add this script to our startup so the web browser will load to the correct URL automatically whenever the Pi is rebooted.
My script is a little more involved than this one here, but that’s because it’s specific to logging in to my Zoneminder system. I’ll go into more detail about this script and how it works in a future post. (Update November 12, 2018: See post Logging Into Zoneminder Using an Authentication Hash for details).
For now, create a new file to hold our script:
$ nano startMidori.shThen type (or copy and paste) the following into the file:
#!/bin/bash

# Disable DPMS (Display Power Management Signaling).
xset -dpms

# Disable the screen saver
xset s off

# Disable screen blanking (so the screen doesn't turn off)
xset s noblank

# Set the URL to use for the display
base_url="https://google.com"

# Launch a web browser and load the URL specified
matchbox-window-manager -use_cursor no & midori -e Fullscreen -a "$base_url" > /dev/null 2>&1In the script above, the only thing you have to change is the address in the “base_url” variable to the URL that you wish to display. It can be anything at all, above I’m using google.com as an example. Just make sure you leave the double quotes ("") around the URL.
Let’s break down some particulars of the script.
#!/bin/bash# Disable DPMS (Display Power Management Signaling).
xset -dpms
# Disable the screen saver
xset s off
# Disable screen blanking (so the screen doesn't turn off)
xset s noblankDisables the built in power saving management options, screen saver, and screen blanking. Since this is a headless viewer that is going to always display content, there’s really no need for the display to turn off after so many minutes with no interaction.
matchbox-window-manager -use_cursor no & midori -e Fullscreen -a "$base_url" > /dev/null 2>&1Use the Matchbox Window Manager to hide the mouse cursor, then launch the Midori web browser in fullscreen mode and load the URL specified in the “base_url” variable. The rest of the line “/dev/null 2>&1” is just used to send any error messages to /dev/null so they’re not being output to the screen.
Testing the Script
Before we can test our script, we need to make it executable so the system can run it.
$ chmod +x startMidori.shLet’s test the script now to see if it will actually launch the web browser to our URL
$ sudo xinit /home/pi/startMidori.shThis will run the script in your terminal. You will likely see a bunch of extra messages in the terminal. The web browser should launch and load the URL you specified. Since this is just a test, you’ll want to close the web browser in order to get back to the command line. You can do this by holding the CTRL key and pressing “c” at the same time.
Run the Script Automatically on Startup
Now that we know our script works, we can add it to our startup so that it will run automatically whenever the Pi reboots.
$ sudo nano /etc/rc.localAdd this line to the end of the file, but before the line “exit 0”
sudo xinit /home/pi/startMidori.sh > /dev/null 2>&1Restart your Pi
$ sudo rebootWhen your Pi boots up, it should launch the Midori web browser and load the specified URL automatically without any action required.
Writing the Restart Display Script
Sometimes you might need to restart the Midori web browser. Particularly with Zoneminder sometimes the camera images freeze on the webpage and you need to reload it*. Since there’s no keyboard or mouse attached, the solution is to close the Midori process and launch it again.
* Note that when this happens the cameras do not lose their connection to Zoneminder, everything keeps working so Zoneminder can keep recording events, etc. What happens sometimes is the camera image will freeze on the webpage you’re viewing it on (in this case the dedicated monitor) so you’re not seeing a live stream anymore. Instead you’re seeing the last image the webpage received from Zoneminder.
For me, my Raspberry Pi display viewer that I’m using is hardwired to a 2.4GHz wireless N access point that is connected to my main network through a wireless bridge. Because this is 2.4GHz, sometimes the signal is disrupted for a few minutes due to interferance while my neighbours are using their microwave. Sometimes the webpage won’t update again when the signal stablizes so I need to reload the webpage.
Let’s create a new file
$ nano restartMidori.shCopy/paste or type the text below into the file.
#!/bin/bash

# Get process ID of running process
process_id="$(/bin/ps aux | grep "midori" | grep -v "grep" | awk '{print $2}')"

# Check if valid process ID and kill if so
if [[ "$process_id" == "" ]]; then
    echo "No process found"
else
    sudo kill "$process_id"
fi

# Wait a few seconds
sleep 5

# Start Midori using startup script and background it
sudo xinit /home/pi/startMidori.sh > /dev/null 2>&1 &Now make this script file executable.
$ chmod +x restartMidori.shIf you want to restart the Midori browser on the Pi, you can SSH to the Pi then issue the following command.
$ ./restartMidori.shScheduling the Display to Turn On and Off
Because my display is only being used to look at my cameras, there’s no real need for the monitor to be on 24 / 7. Not only is this a waste of energy but the white background is also surprisingly bright at night.
We can accomplish this really easily using the “vcgencmd” command.
If you execute the command below in your shell on the Raspberry Pi, the monitor will turn off.
$ vcgencmd display_power 0Issue the command again but with a “1” as the argument this time and the display will turn back on.
$ vcgencmd display_power 1Now that we know we can do this manually, we can move on to doing this automatically : )
To do this we’re going to use the built-in scheduling software on Linux called “cron”.
Describing the features of cron are outside the scope of this article, but here are the basics:
- Scheduling takes place by editing a file called “crontab”
- Each user has their own crontab, and the commands specified will run as that user
- There is one entry per line, which consists of the time the command will run and the command itself
- It’s generally considered best practice to include the full path to a command instead of the command itself (i.e. “/usr/bin/ls” versus “ls”)
- Lines beginning with a “#” are comments and are not executed
Edit your user’s crontab file with the following command:
$ crontab -eNote the first time you edit your crontab file it may ask you which editor you want to use. The default is usually number 2 which is “nano”. Hit enter to continue.
Add the following commands to the end of the crontab file below the last comment so that the file looks like this:
# m h  dom mon dow   command
# Turn monitor off at 1:05 AM
05 01 * * * /usr/bin/vcgencmd display_power 0

# Turn monitor on at 7:05 AM
05 07 * * * /usr/bin/vcgencmd display_power 1
You can change the times to suit your needs, just remember that the hour must be specified in 24-hour format (i.e. 1PM = 13). In the crontab file above, the command to turn off the display will run at 1:05 AM (01:05), and the command to turn the display back on will run at 7:05 AM (07:05).
Save the file by holding the CTRL key and pressing “o”, then hit enter. Then exit Nano by holding the CTRL key and pressing “x”.
Physical install
Since I want to keep things as physically neat and clean as possible, I came up with a solution to attach the Pi to the back of the monitor.
I used a standard VESA mount that I had lying around and screwed it to the VESA mount points on the back of the monitor.
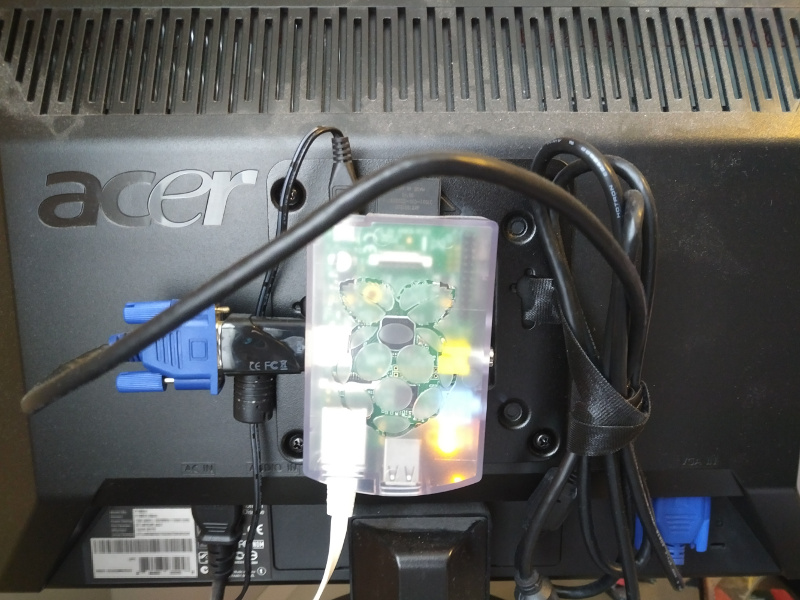
While you can get VESA compatible cases for the Raspberry Pi, I figured I’d use some magnets I had to hold the Pi in place. I used Gorilla Glue to glue four small neodymium magnets to the feet of the Raspberry Pi case.
I bought a 100-pack of these magnets off Amazon a few months back with the intention of only needing a few, but I’ve since used them on all sorts of projects! Highly recommended!!
Finish it all up by making the cables nice and neat with Velcro Ties. In this case I also looped the velcro tie through one of the openings on the Vesa mount to prevent the VGA cable from slipping down under the monitor.
If you have any questions/comments please leave them below.
Thanks so much for reading ^‿^
Claire
If this tutorial helped you out please consider buying me a pizza slice!